For some reason, Nintendo decided it was not necessary to provide an RGB output on the Nintendo 64, the only way to connect it was through RF, Composite, and S-video. Luckily there are a couple of modding options including HDMI.
There are a couple of different N64 versions made. The NTSC and early French versions with the VDC-NUS chip can be modded with the cheapest option using an RGB-AMP PCB. These mods can be bought for around $15 but won’t give you any extra features. It is however the easiest mod to do requiring the least soldering skills.
When you want the extra features like de-blur and you have an N64 without the VDC-NUS you can choose for RGB Advanced made by borti4938 or the N64 RGB by Tim Worthington.
The mod made by borti4938 called RGB Advanced can selectively output RGB, YPbPr, or VGA signal. It also features an on-screen display for configuration, line-doubling, and bob de-interlace! It will costs you around €138,- This mod needs to be soldered to the graphics chip, be sure you are up for that because it has a very fine pitch.
The mod made by Tim has fewer options but with the new firmware from borti4938, it also features a de-blur, 15bit color mode, and IGR. This mod will cost you around €50,- This mod needs to be soldered to the video encoder/DAC, this is easier but you still need to be sure about your skills.
If you want to get the best possible future proof signal you probably want to get the UltraHDMI mod. This mod will output HDMI, scale up to 1080p and offer some additional options like scan-lines available from the on-screen configuration menu. It will cost you around €180,- This mod also needs to be soldered to the graphics chip, be sure you are up for that because it has a very fine pitch.
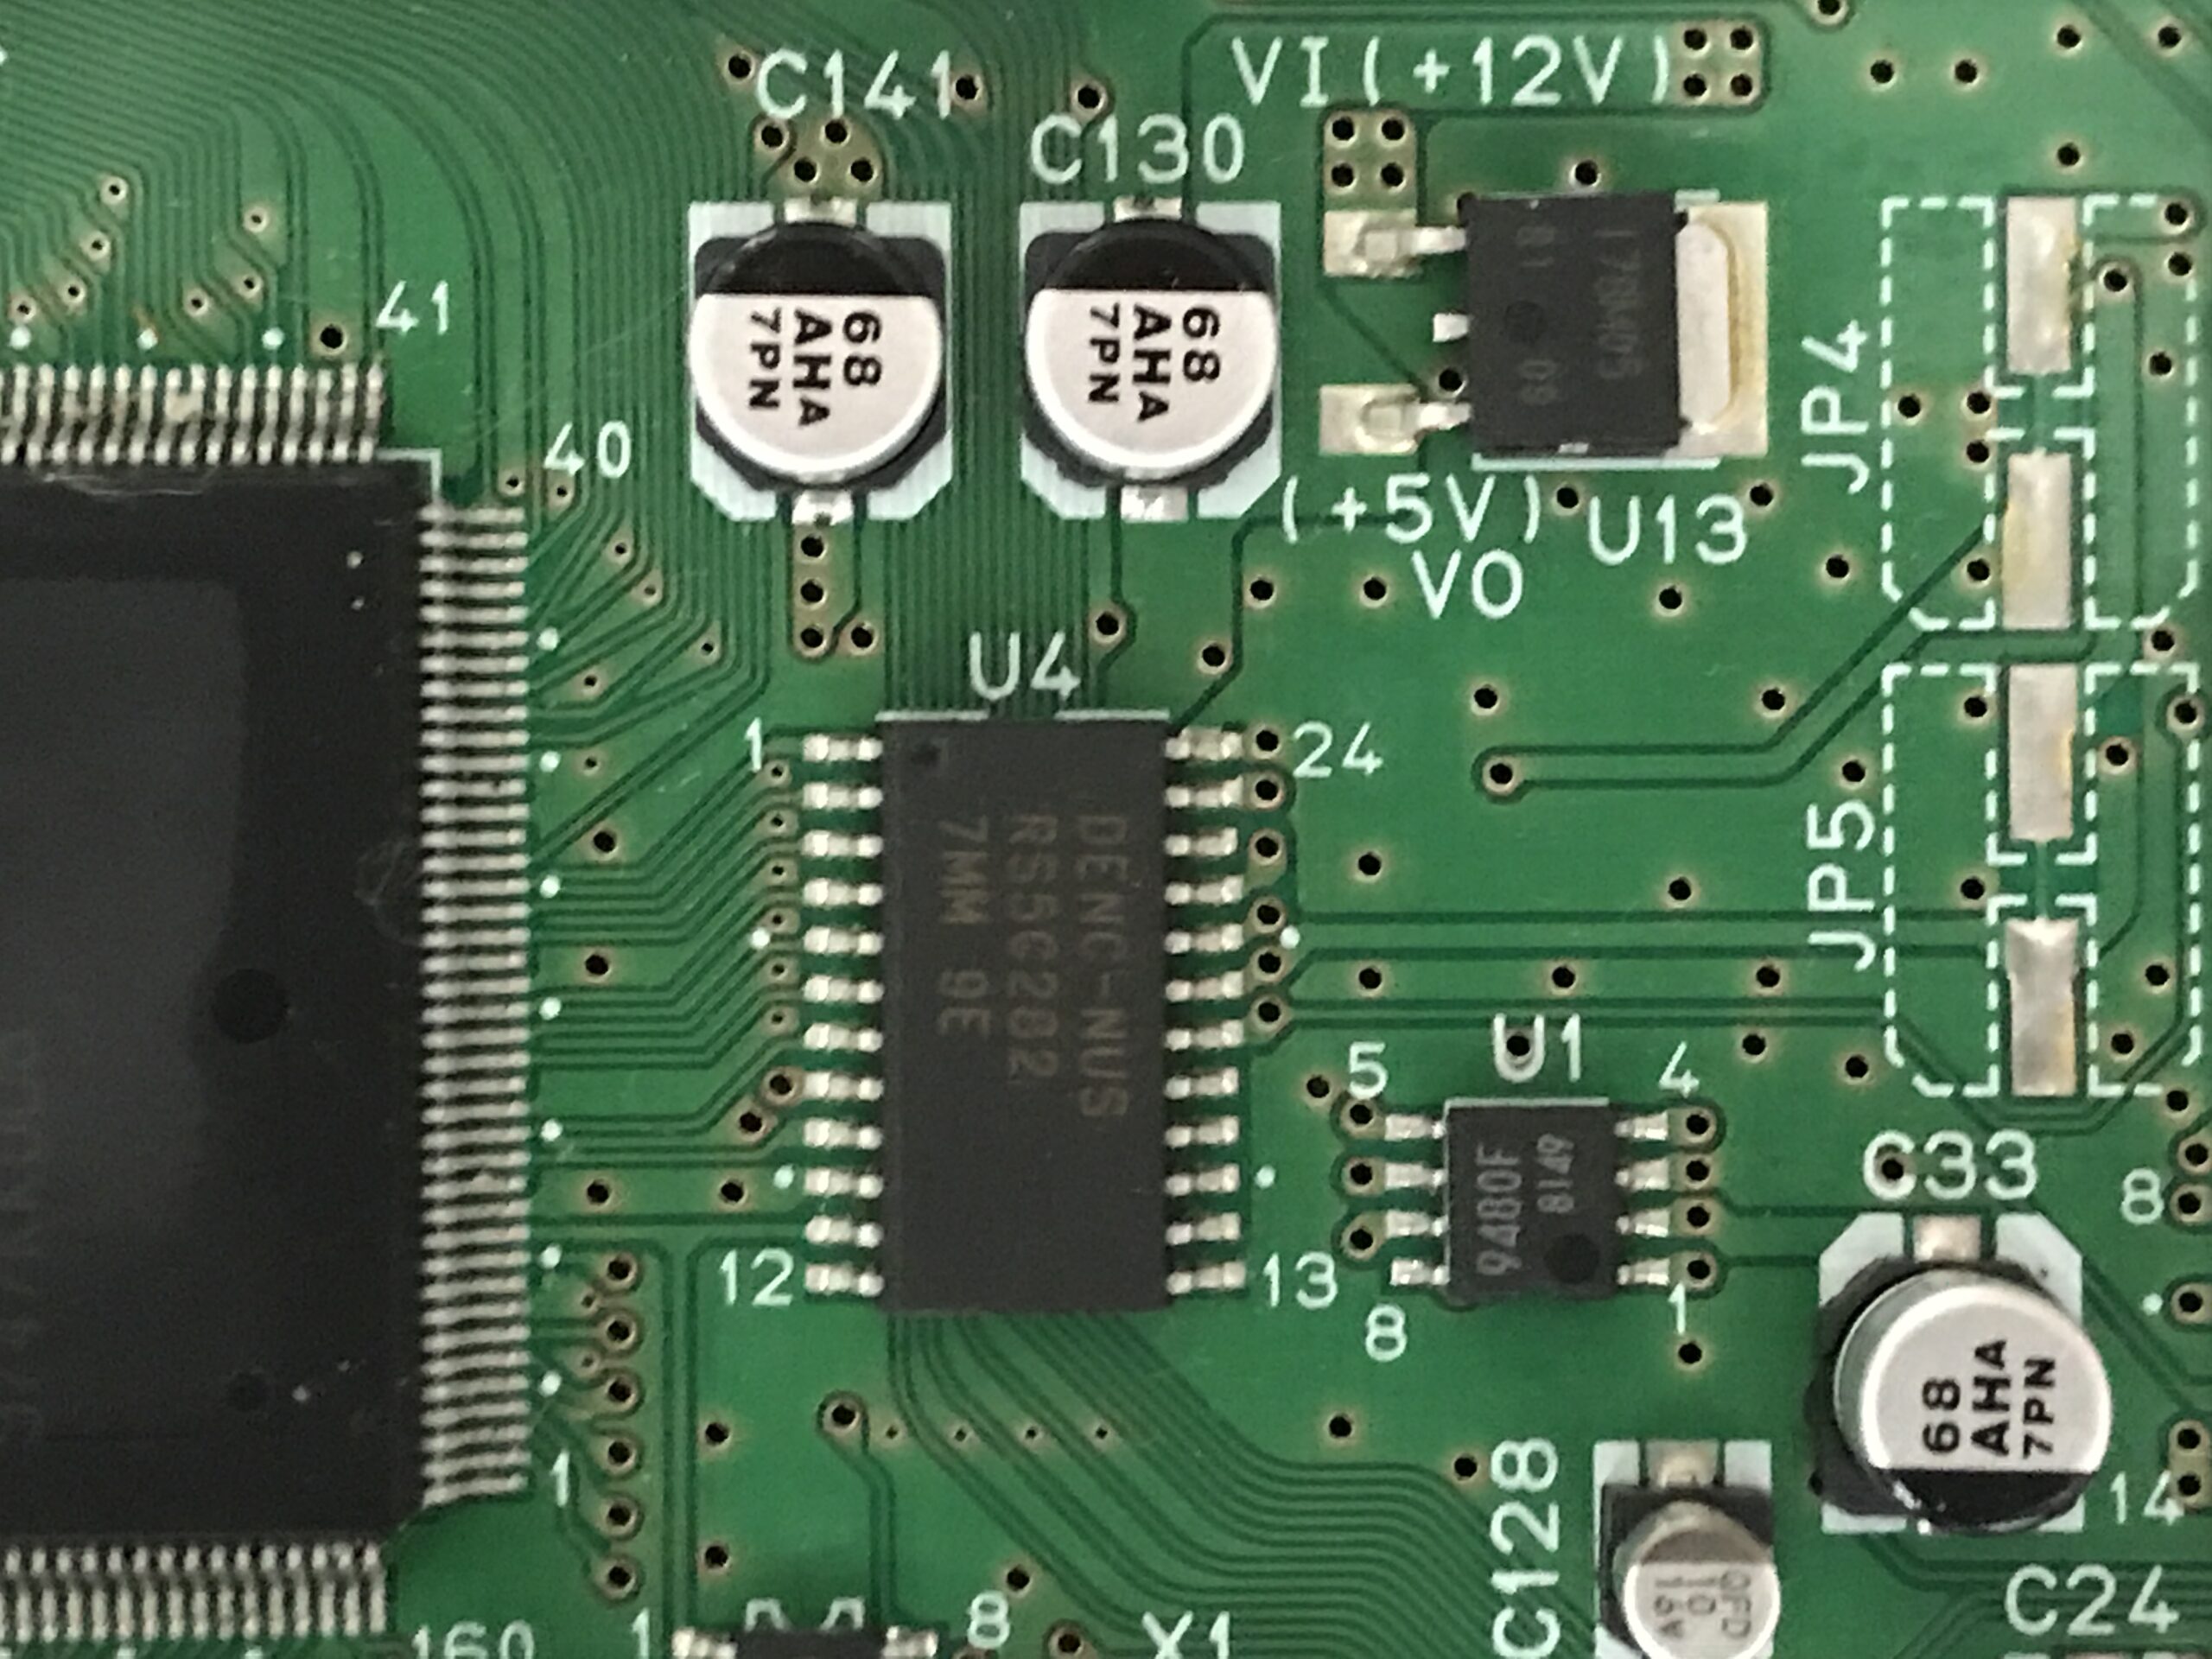
So as you can see there are some great options! Too bad they are not readily available. The only one available was Tim’s mod with the new firmware. I bought it from oldschoolconsoles.com. Let’s start with identifying the chip, you should do this before you buy your mod because if you have a MAV-NUS or AVDC-NUS you make your life a lot easier buying the fine pitch adapter. You will need the special Nintendo screwdrivers. These screwdrivers can be found plentiful from the interwebs delivered cheaply from China but if you have a game store nearby you should support those and buy from them! In the picture below is my console opened up. If you look closely you can see it has a DENC-NUS chip. This is nice because it has a 1.27mm pitch which is the same as the provided ribbon-cable.
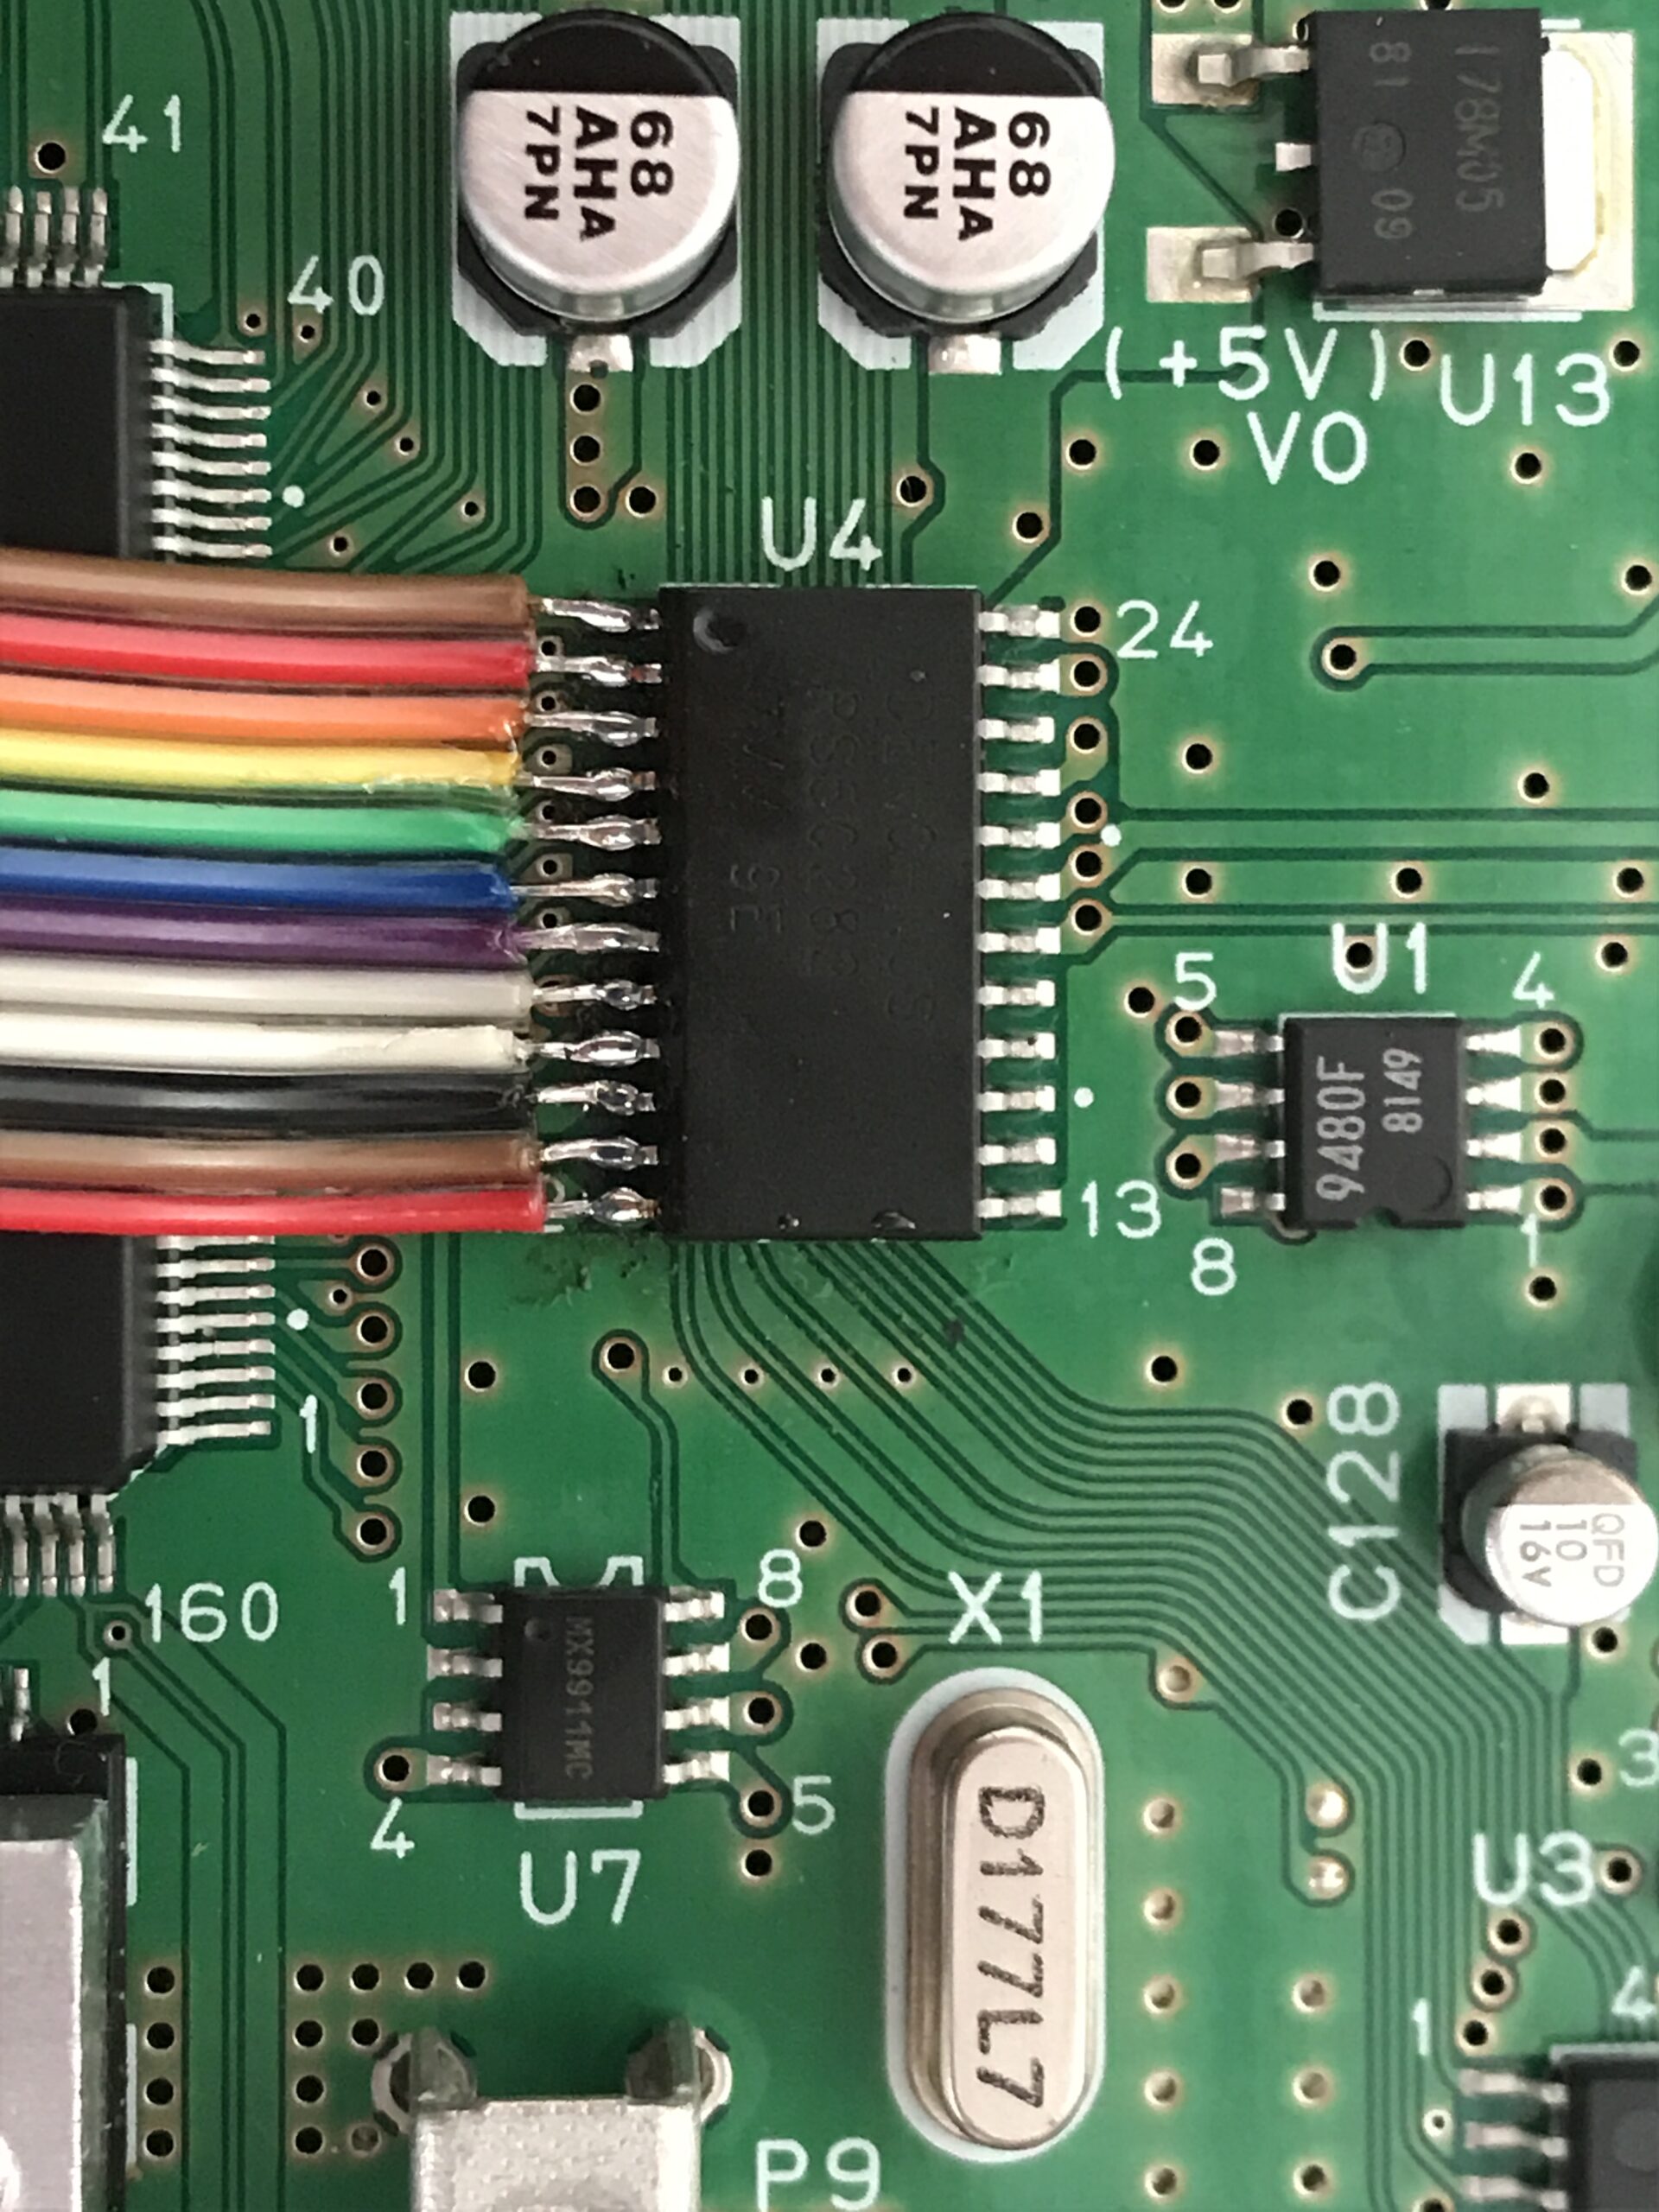
Following the installation instructions this mod is really straightforward. Strip the ribbon cable and solder it onto the encoder chip then repeat at the other end and solder onto the N64RGB PCB. When that’s done solder another ribbon cable to the multi-out port. If you have the new firmware you can use two more wires to connect to the “PIF-NUS” so you can enable the de-blur, 15bit mode and in-game-reset and then it is time to test!
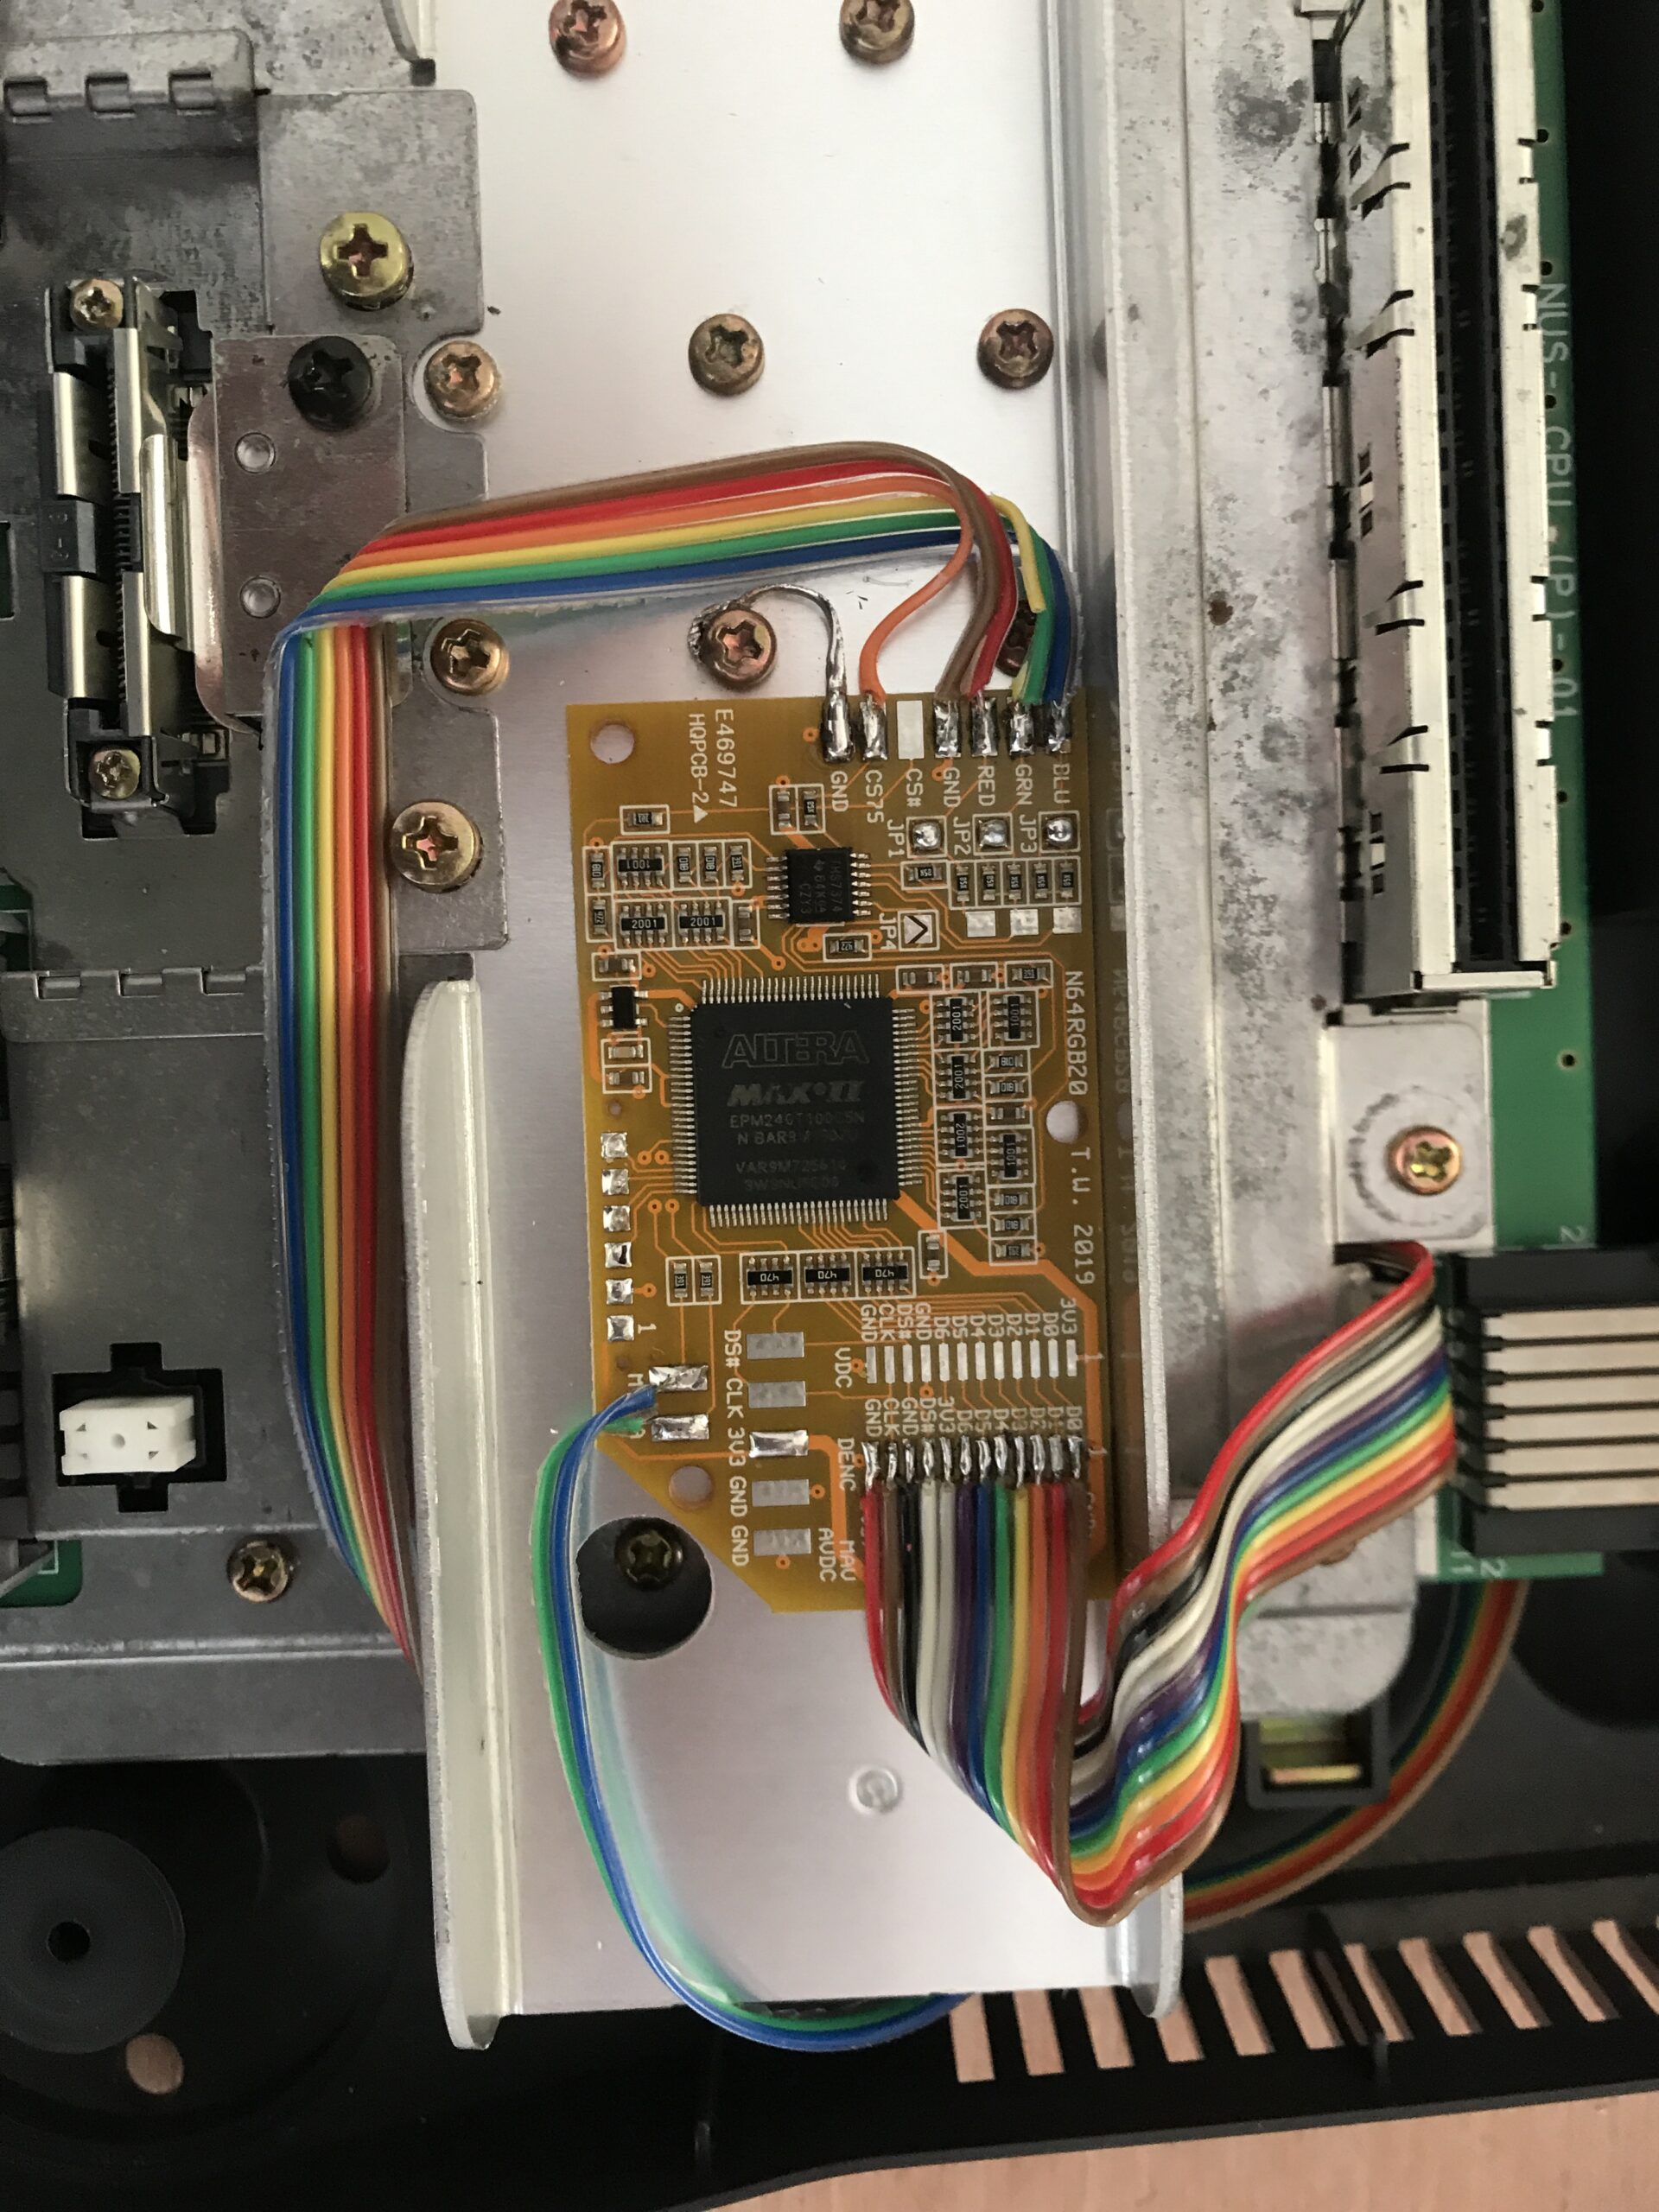
This is when I had a big scare! The TV screen stayed black! I used my trusty old multimeter to check all the connections and they all checked out… I decided to desolder everything and see if my N64 would work without the mod. After I desoldered the whole thing I found what the problem was. I previously forgot to insert the JumperPack and without it, an N64 will not boot… So I resoldered everything in place and now it works! So here is a picture from my second test;
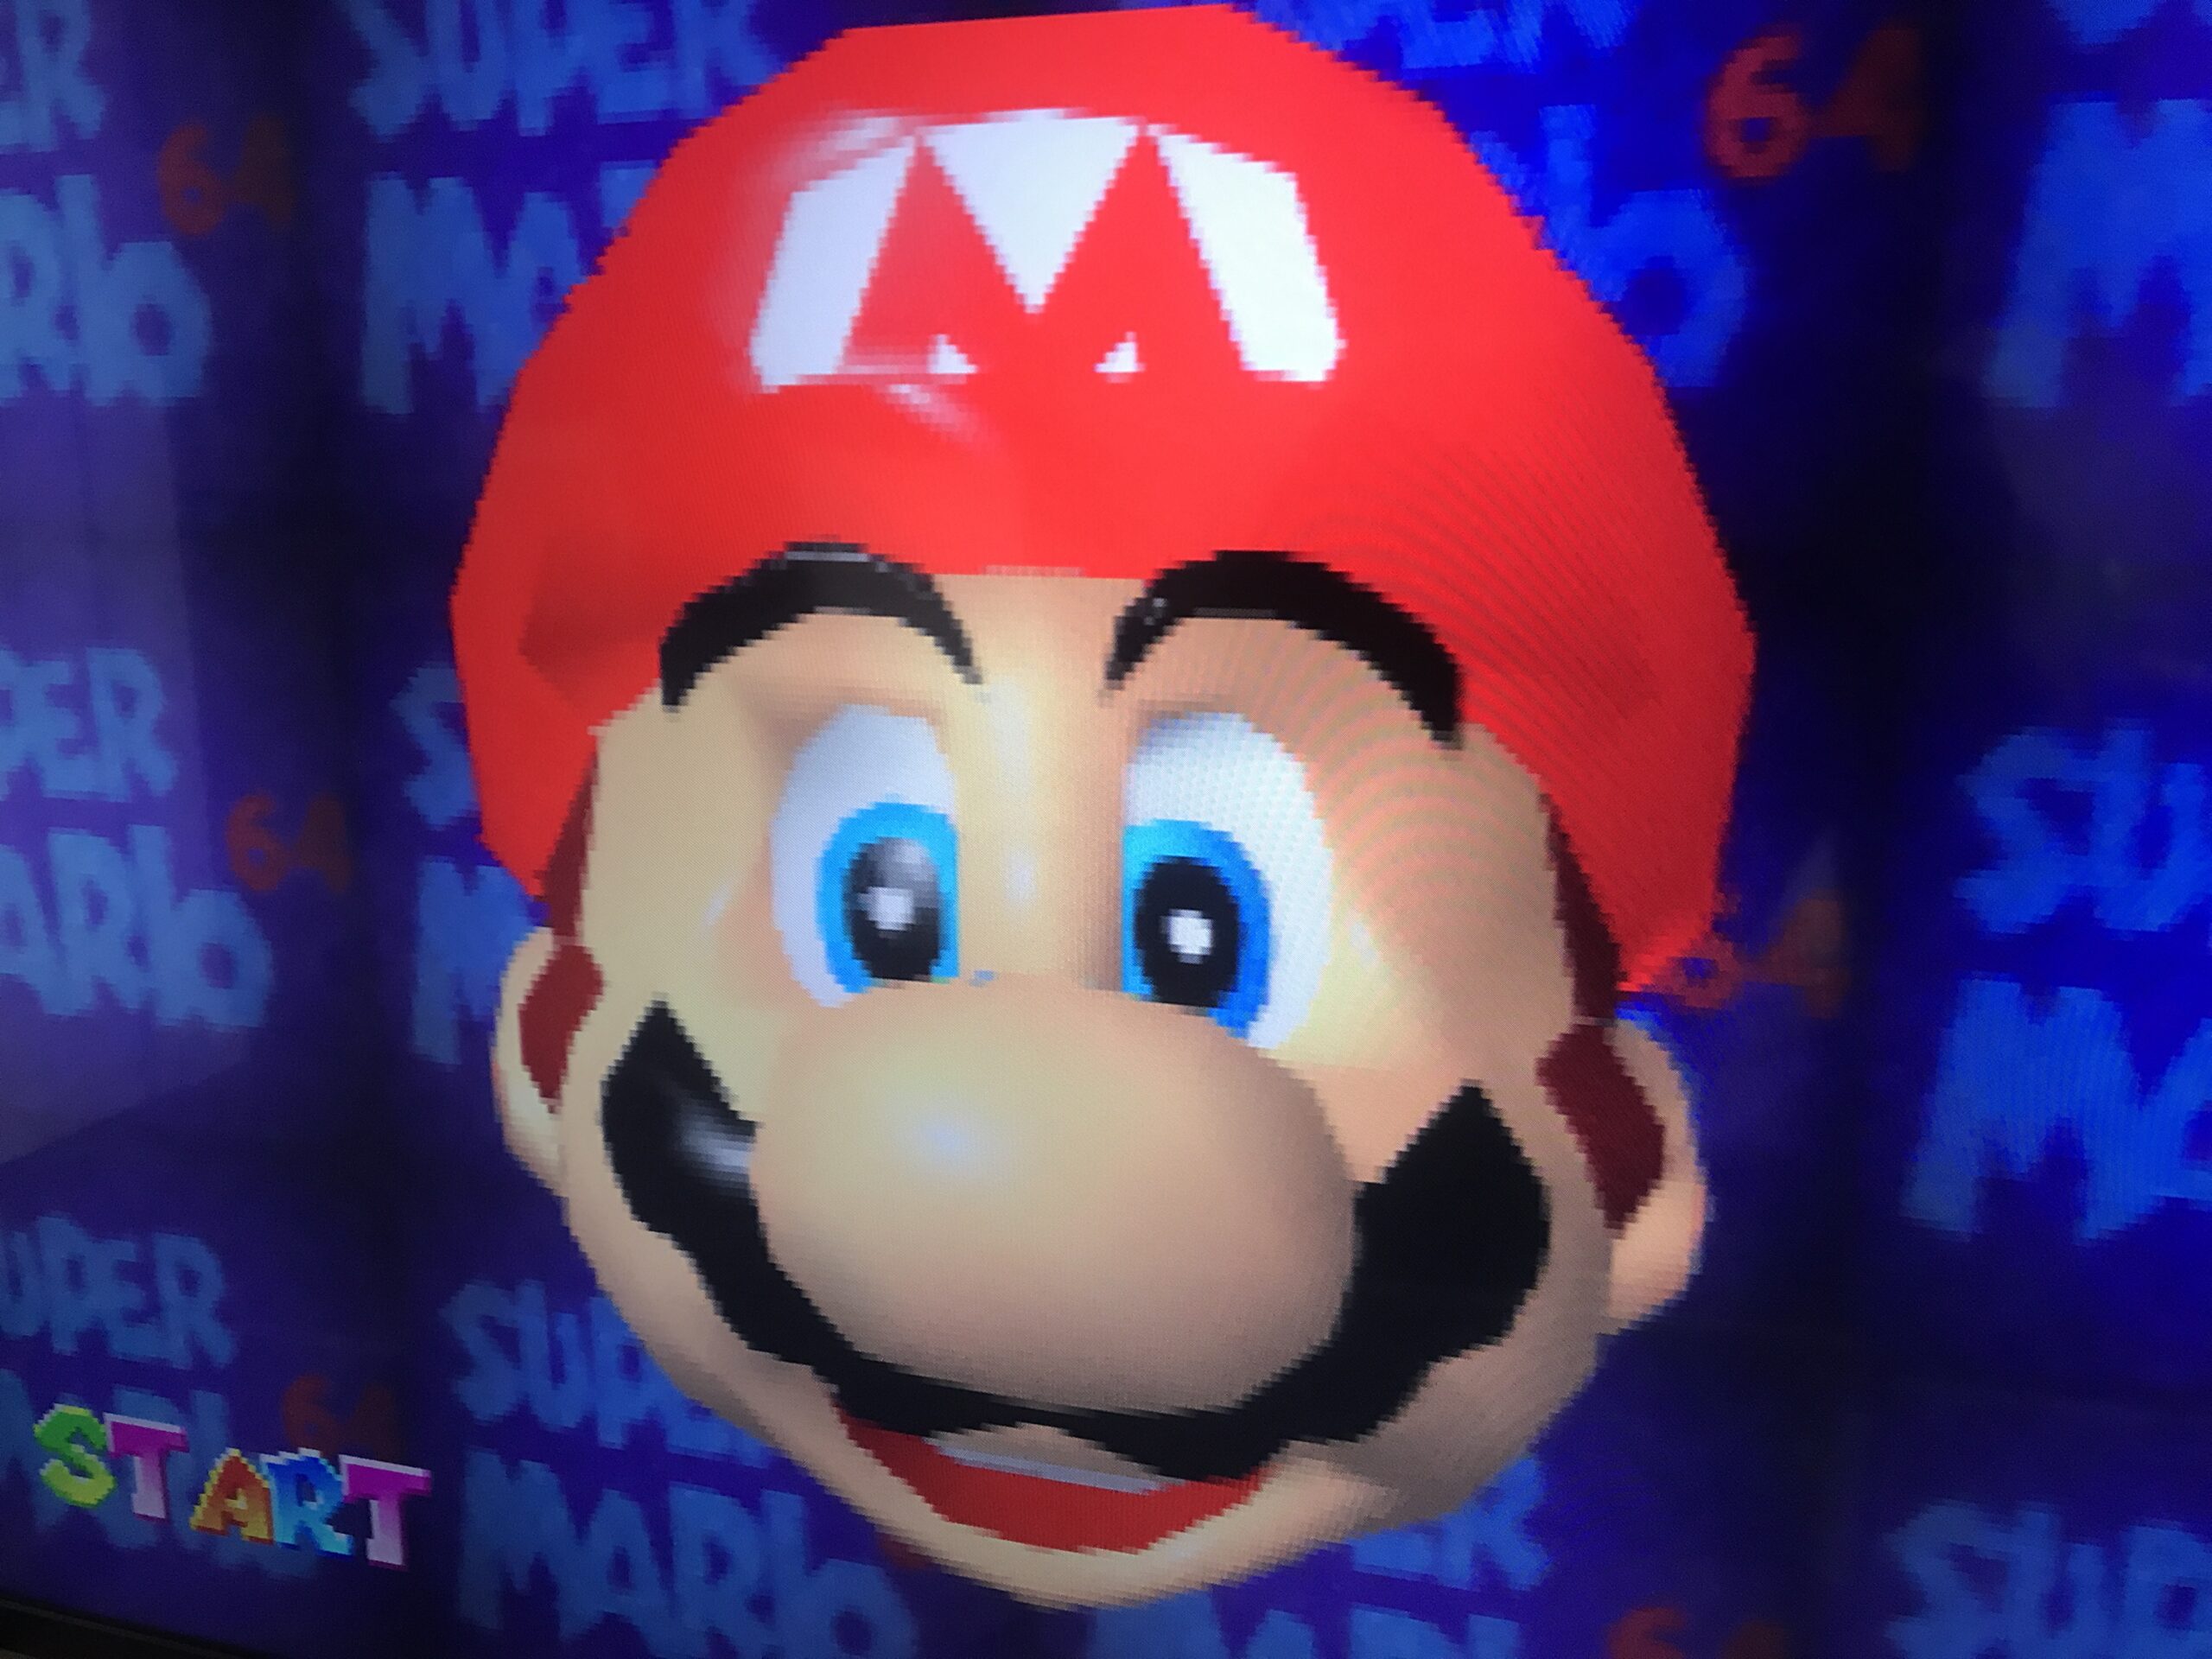
The result is really good! It is so cool we can do these things today and be able to make use of our beloved game consoles again. I am very happy with the result but while the image is improved it won’t make it as sharp as the virtual console games available on Wii-U/Wii. For some games, this can be annoying. To solve this I enabled the scanline option available on my GBS-Control this makes the experience even better, nothing beats playing on the original console! Anyway 🍻 and happy gaming!
Dear vandoeselaar.com admin, Keep up the good work!